

You have the ability to create custom competitions for your venue with the Events Module. Here you will be able to set up competition events as well as other social events.
Please Note: The system isn't set up for social events as such, we are working on this and hopefully it will be a new feature implemented to the system soon. However, as a workaround, you could set up a custom competition event, which you can call what you wish, i.e. Quiz Night.
Step 1:
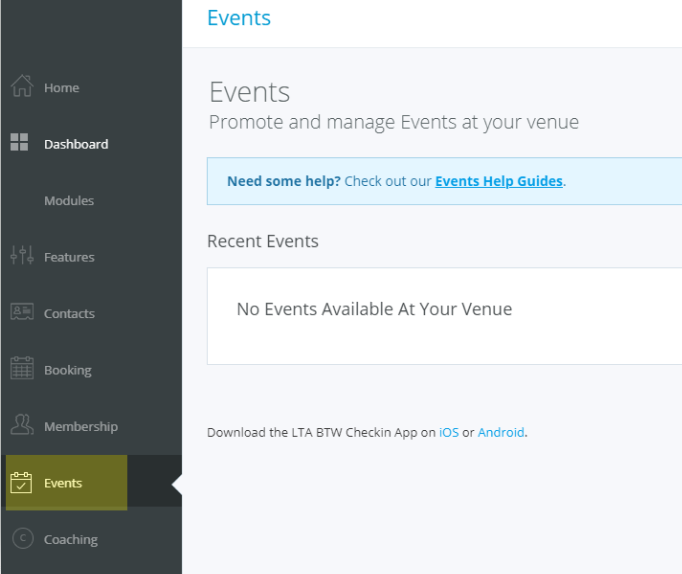
You'll first need to head to the Admin Area and go to the Events Module (highlighted in the image below)
First, go to the 'Admin Area' and go into the 'Events' module on the left-hand side.
Step 2:
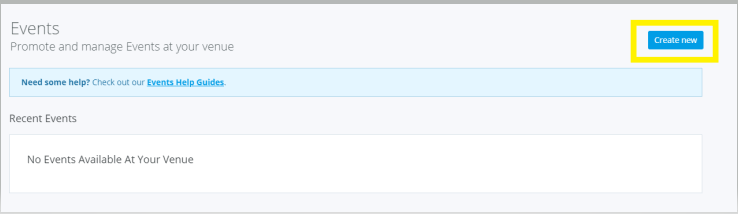
Once within the Events Module, you'll need to click on the blue 'Create Event' button located on the right-hand side of the screen.
Where the following overlay will appear:
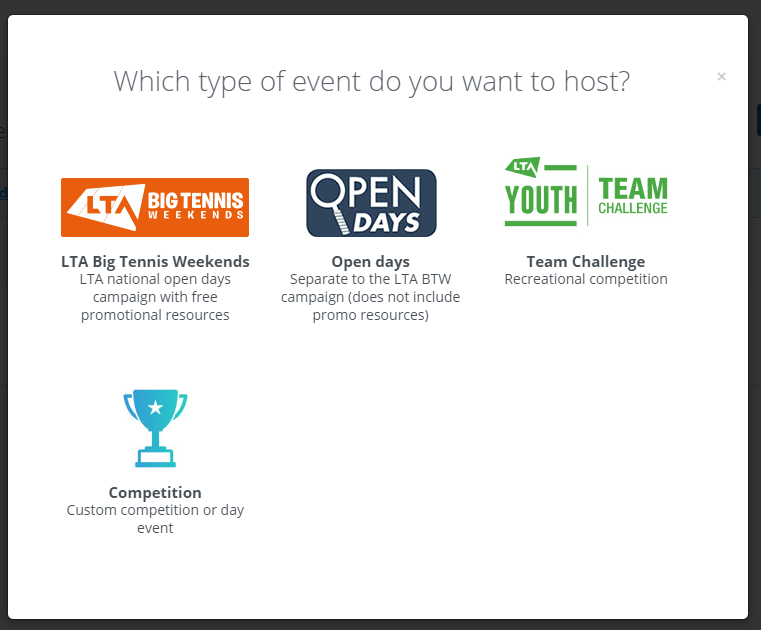
You'll need to click on the 'Competition' option.
Step 3:
Once you have selected 'Competition' you'll be taken to the next page where you'll need to set up/create your event.
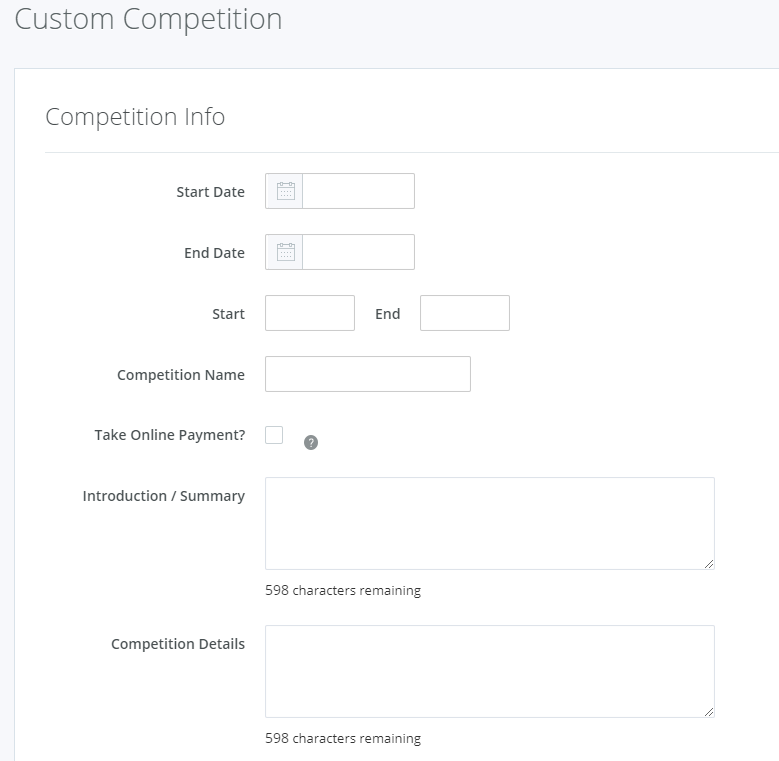
Start & End Date - Here you'll be able to select/enter the start and end dates of the event, these can be the same date.
Start & End Time - Here you'll enter the start and end times of the event
Competition Name - Here is where you'll enter the name of your event
Take Online Payment? - If you are choosing to charge for your activities within this event, you can take payment online via Stripe to ease the process and ensure that money is received prior to the event.
Introduction/Summary - This text box is free for you to enter your own information about the event.
Competition Details - This text box is free for you to enter your own information about the event.
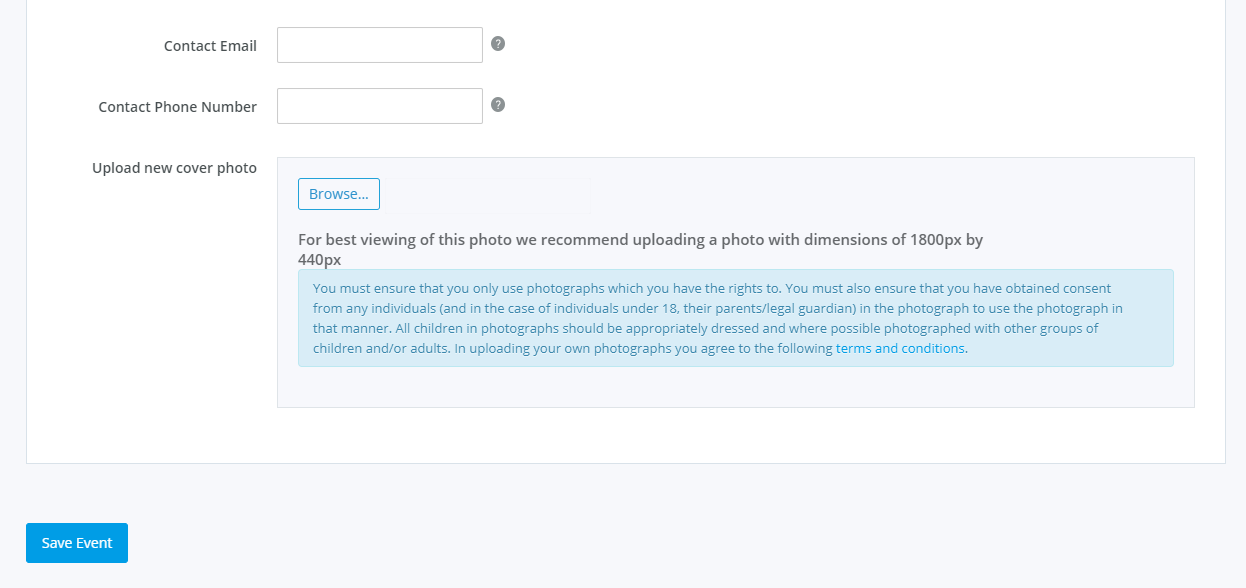
Contact Email - Here you'll need to enter a contact email address that will be displayed online with your event and will be publicly available to those viewing your event page.
Contact Phone Number - Here you'll need to enter a contact phone number that will be displayed online with your event and will be publicly available to those viewing your event page.
Cover Photo - You can upload your own image to display for the event.
For best viewing of this photo, we recommend uploading a photo with dimensions of 1800px by 440px
Once you have completed this, you'll need to click on the blue 'Save Event' button.
Step 4:
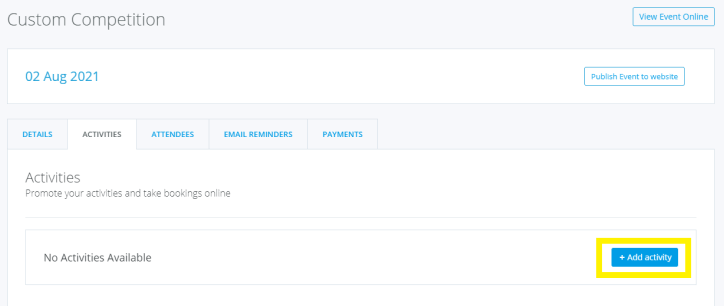
Now that you have set up the event, you'll now be able to create your activities and sessions.
You'll first need to create an activity, by clicking on the blue '+ Add Activity' button (highlighted in the image below)
Once you have clicked on the 'Add Activity' button, the following will appear:
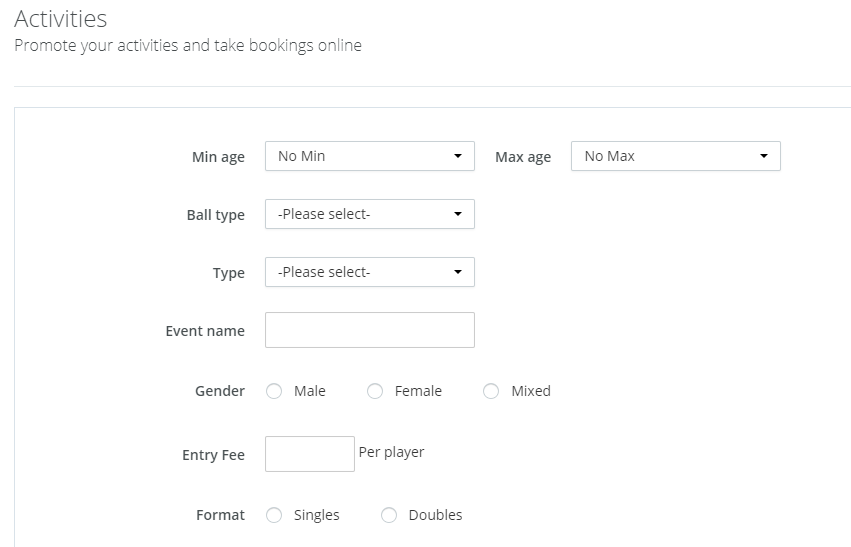
Minimum & Maximum Age - Here you'll be able to enter in the minimum and maximum age a player is required to be to take part in this activity. If you have no minimum/maximum age then you can leave them as they are i.e No Min and/or No Max
Ball Type - Here you'll select the ball type/colour; none, red, green, orange or yellow. This should be dependant on the age range that you have set.
Type - Here you can select what type of activity this will be; LTA Youth Start, Junior, Adult or Any
Event Name - Here you can enter the name of this activity i.e Yellow Ball Junior
Gender - Next you can select the set gender for this activity; Male, Female or Mixed
Entry Fee - Here you'll enter the entry fee per player. If you selected to take payment online, then this is also the price (per player) that will be paid when they sign up for the event. If you haven't selected to take payment online then this is the money that you will receive on the day.
Format - Here you'll select what format this activity will be; Singles or Doubles. This means that when players sign up for this activity they will be able to enter their doubles partner if you have selected 'Doubles' (for example)
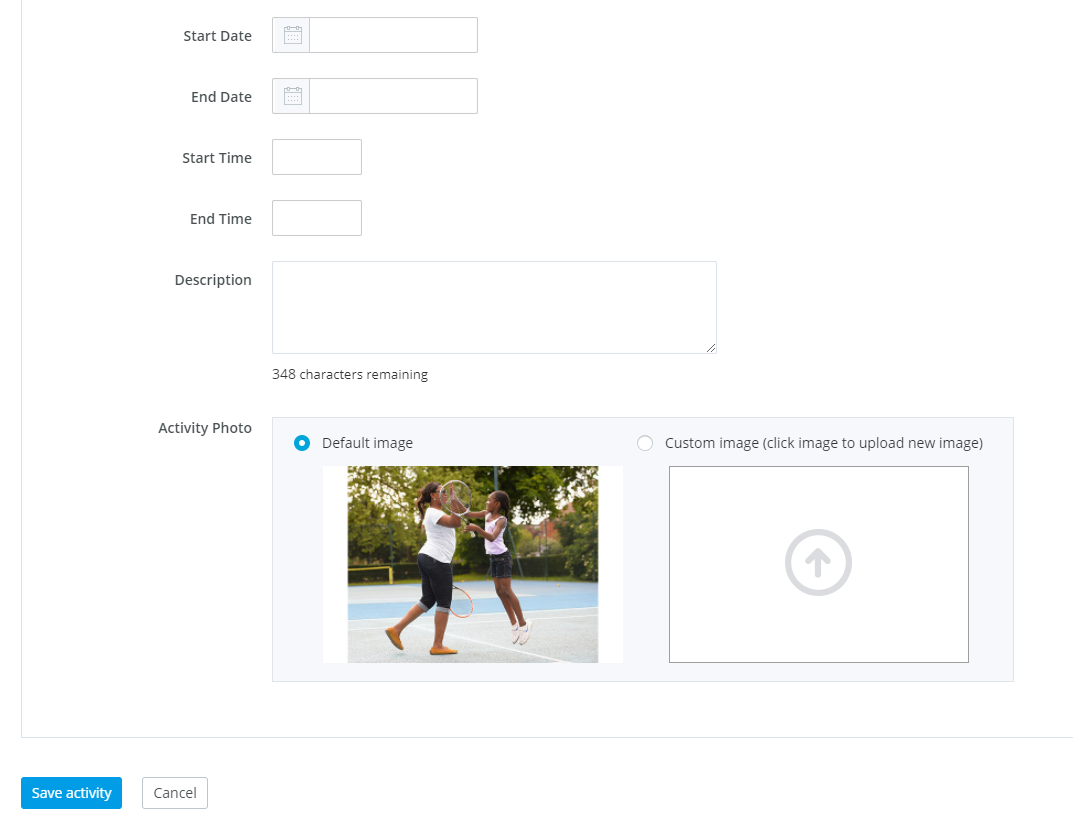
Start & End Date - Here you'll be able to select/enter the start and end date of the activity, these can be the same date.
Start & End Time - Here you'll enter the start and end times of the activity
Description - Here you'll be able to enter a description of the activity
Activity Photo - A default image will appear here. However, you can upload your own image. If you choose to upload your own image then for best viewing of this photo we recommend uploading a photo with dimensions of 544px by 358px
Once you have created your activity, please remember to click the blue 'Save Activity' button.
Step 5:
Once you have created all your activities and sessions, you can now publish your event for participants to book onto.

Any comments?
If you have any thoughts or comments on this article, please contact us at support@clubspark.co.uk